


Level up your online lessons with multiple media sources using OBS.
Open Broadcasting System (OBS) is free and open-source software that allows you to take still images, video, and audio from any source and combine them into a single output for video recording and live streaming. Many teachers on Forte are using OBS to get better control and flexibility over what their students see during a lesson and how it is arranged on the screen. With OBS, you can create an amazing combined livestream for your lesson, customized for you, your instrument, and your teaching style.
As with any software, getting the most out of OBS requires a small investment of time. For most teachers, Forte’s built-in tools for screen sharing, toggling between cameras, and adding a second camera provide everything they need for a great lesson. But for those of you who want to take your technical setup to the next level, read on and learn how useful OBS can be. Below, I outline ways to help you, as a music teacher, focus on the most practical and helpful way to start.
The first step toward using OBS is to download it. It’s extremely fast and easy to download to any computer. Visit https://obsproject.com/download and select your operating system. Then, start the download, click on the file once it is finished, and run the installer. The entire process should take only a few minutes. After you download OBS, launch the application, and you are on your way to having more detailed views of your demonstrations, more control over your screen sharing, and so much more.
Setting your scene and adding sources:
Think of your music lesson as a big Hollywood movie complete with scenes, sets, actors, special effects, and of course, music!
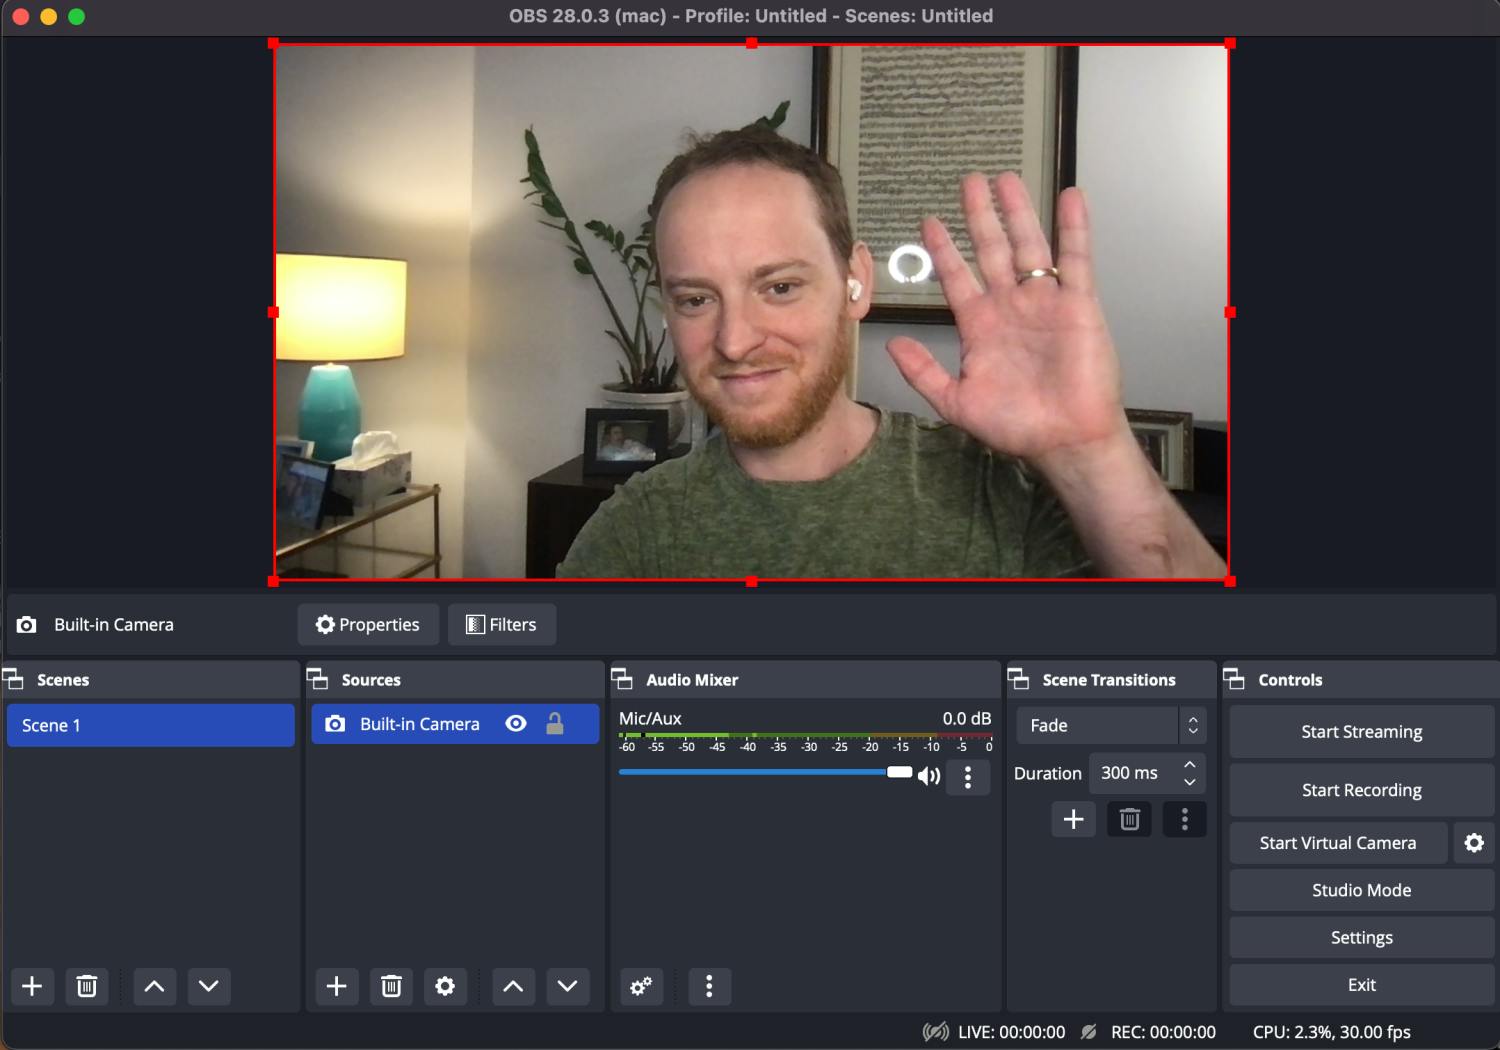
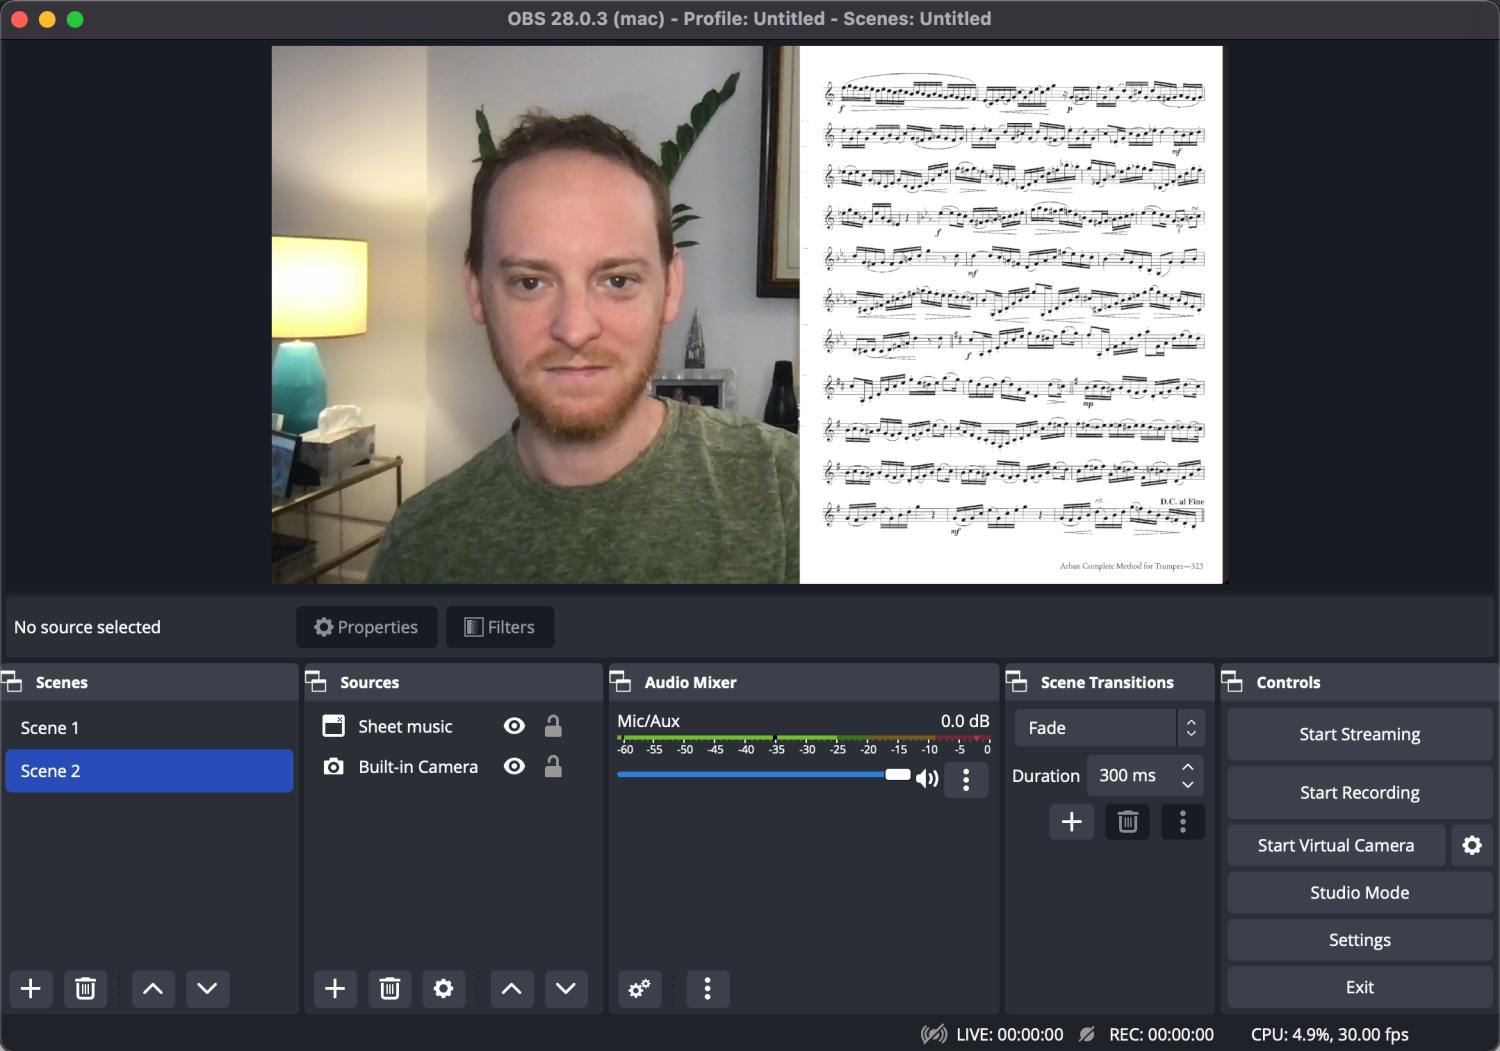
The first thing you need to do is set your first scene in OBS. A scene is where you set up your stream layout, add your webcams, images, sheet music, and any other devices or media you want in the output. A good place to start is with the most basic, but also one of the most engaging, scenes you might utilize in an online music lesson. The built-in camera front-center and full-screen.

Scene 1:
Create a scene by clicking the plus button in the lower-left corner of the scenes section and giving your scene and name “scene 1,”
Now you need to add actors, sets, and props to the scene. This is called adding a “source.” A source can be anything from a camera to a PDF to a Powerpoint presentation. For this simple first scene, the only source will be your built-in camera.
Click the + button in the lower left of the Sources section. You are adding a video camera, so you want to select “video capture device” from the list.
Create a new source by giving your source a name. I will call my source “Built-in camera.”
Choose the correct camera from your list of available cameras. I chose Facetime camera because I am on a Mac laptop, and that is my built-in camera.
Move and resize this new source within your OBS scene.
Move the source by clicking anywhere on the image.
Resize the source by clicking on any one of the red dots that outline the source.
If the outline of your source is red, that means you cannot expand it any further, but you can crop it. Hold the option key and then click on any of the edges you wish you crop.
Wave to yourself in your new OBS scene and pat yourself on the back. You are ready to stream with OBS!

Streaming your scene through Forte:
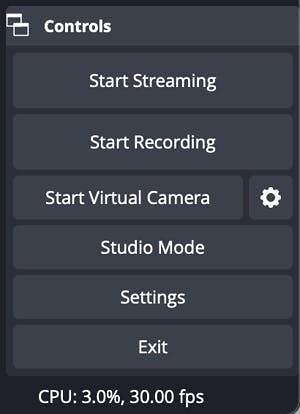
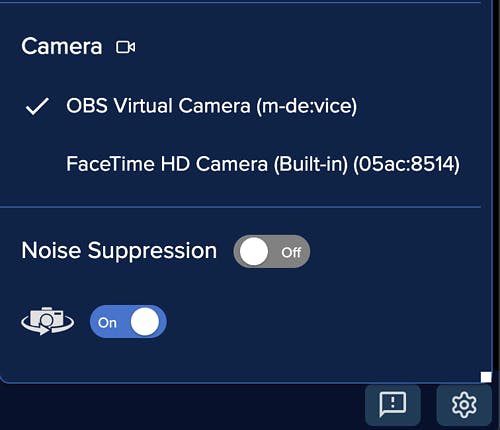
Once you have set your first scene, you need to broadcast that scene through Forte. The OBS virtual camera takes all of the sources of your scene and packs them all into a single virtual output so that your Forte camera selection will reflect your OBS scene. I will outline below how you can compose your scenes into one cohesive view for your students using different types of media, but in order for your students to see your OBS scene, you must start the OBS virtual camera.

Now that your virtual camera is running let’s go over to Forte and start our lesson. Once you are in your Forte Studio. Open the settings menu and you should see OBS Virtual Camera in your list of available cameras.

Now you are streaming your OBS scene on Forte!
Adding more sources:
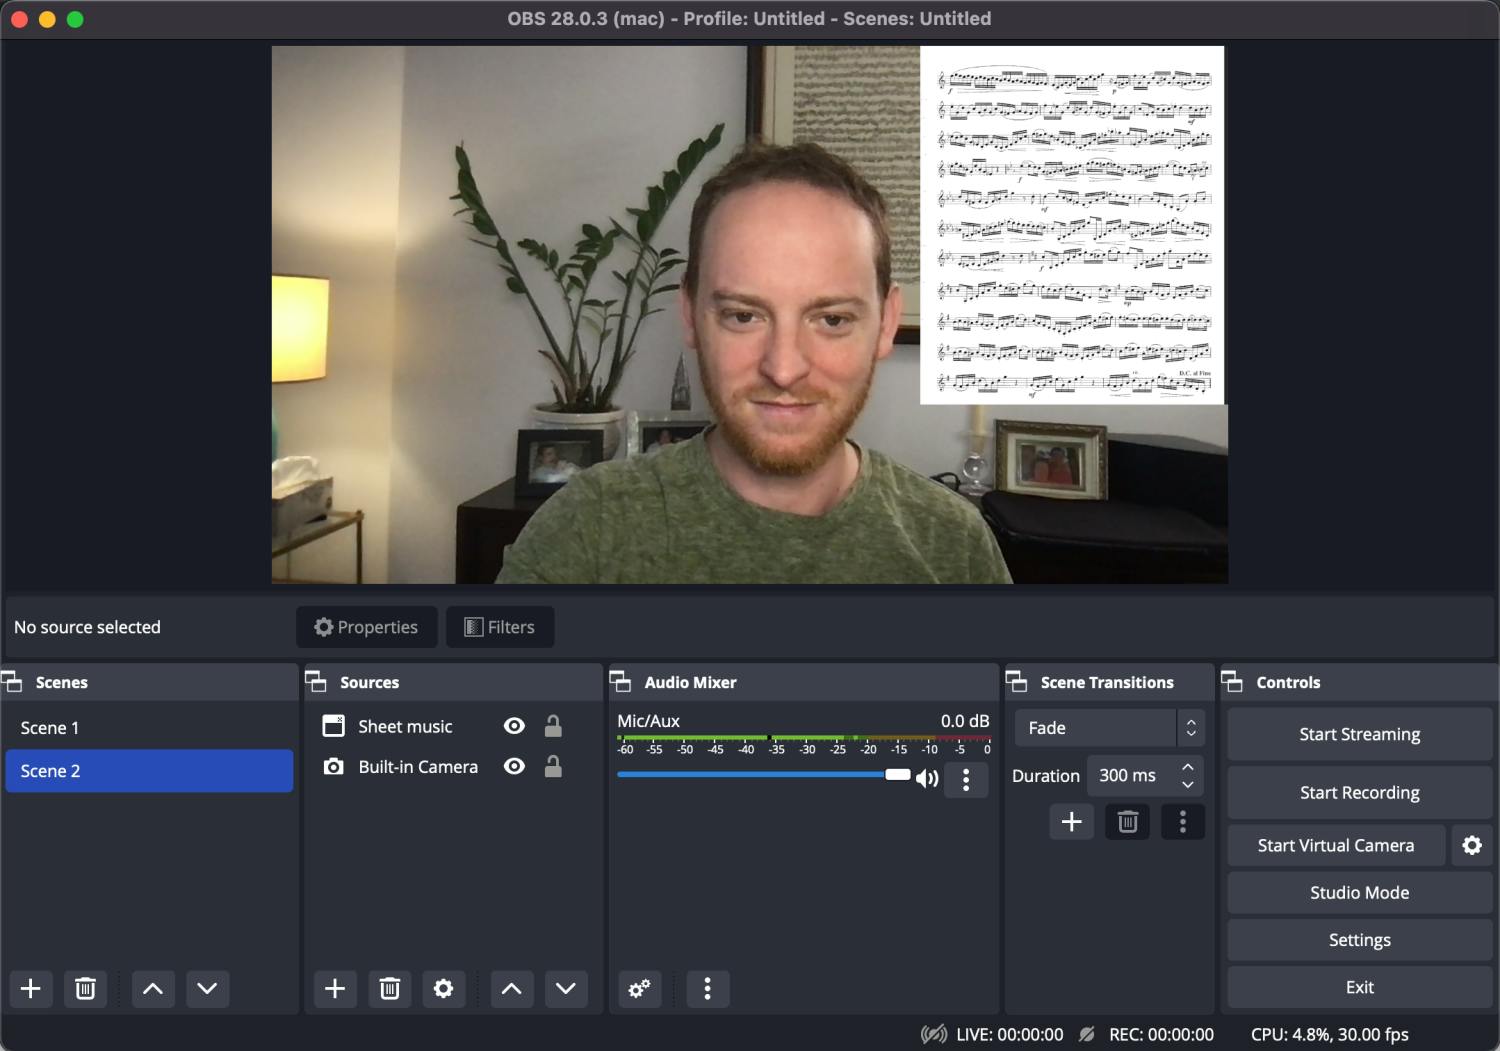
Scene 2:
Not all of your sources will be cameras. For example, you may want to add a window capture of sheet music to your scene. Let’s create another scene and add the sheet music I have open in a separate window. Let’s call this “scene 2.”
First, add the front-facing camera source, just like we did before.
Click the + button in the sources section and select “video capture device.” Since we have already set up the FaceTime camera as a source for our last scene, we can choose the existing source, “Built-in Camera.”
Now, add the sheet music.
Click the + button in the sources section but this time select “window capture.” This adds the entire selected window directly to your scene. This includes how you resize the window and any markings you add or page changes you make within the window.
Name your source ”sheet music.”
Now you can move, resize, and crop (hold option on mac, alt for Windows, and click) the two sources together so that the scene looks best for your purposes.

Scene 3:
Let’s get a little more advanced and add an external webcam for “scene 3.” I am using a Logitech BRIO webcam connected directly to my computer via USB-C.

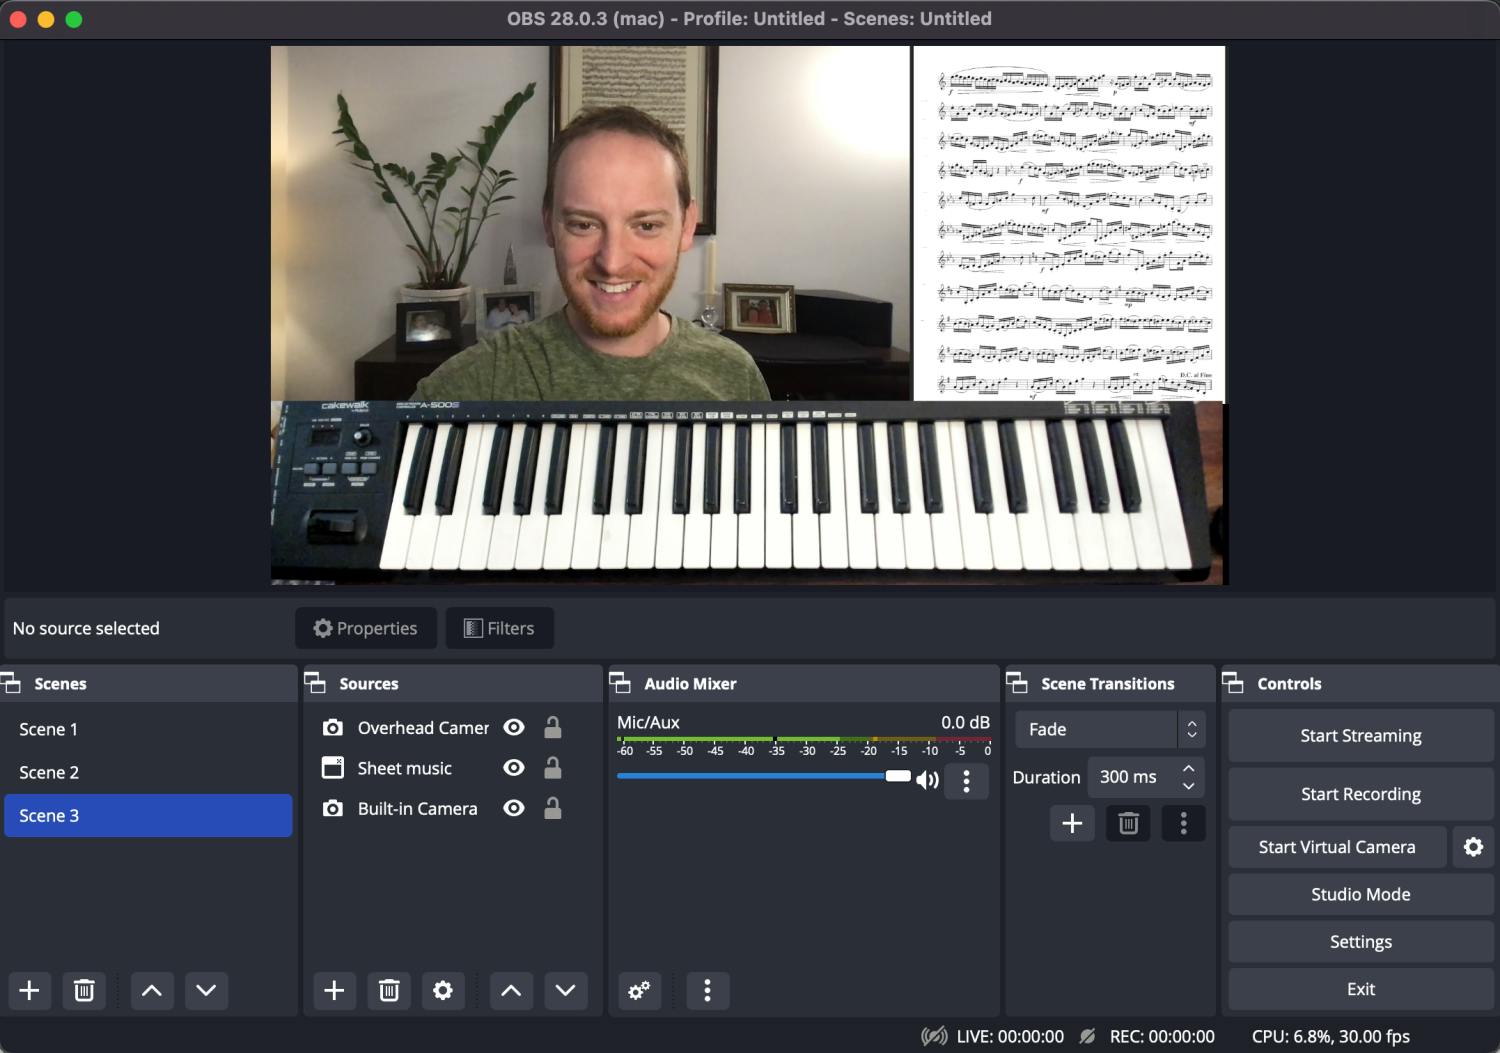
The first step is to create and name your new scene (Let’s call this “scene 3”) and then add the three sources we are using to create the scene.
Front facing camera
Click the + button in the sources section and select “video capture device.” Since we have already set up the FaceTime camera as a source for our last scene, we can choose the existing source, “Built-in Camera.”
Sheet music window (open in preview application)
Click the + button in the sources section and select “window capture.” Since we have already set up the sheet music window as a source for our last scene we can choose the existing source “sheet music.”
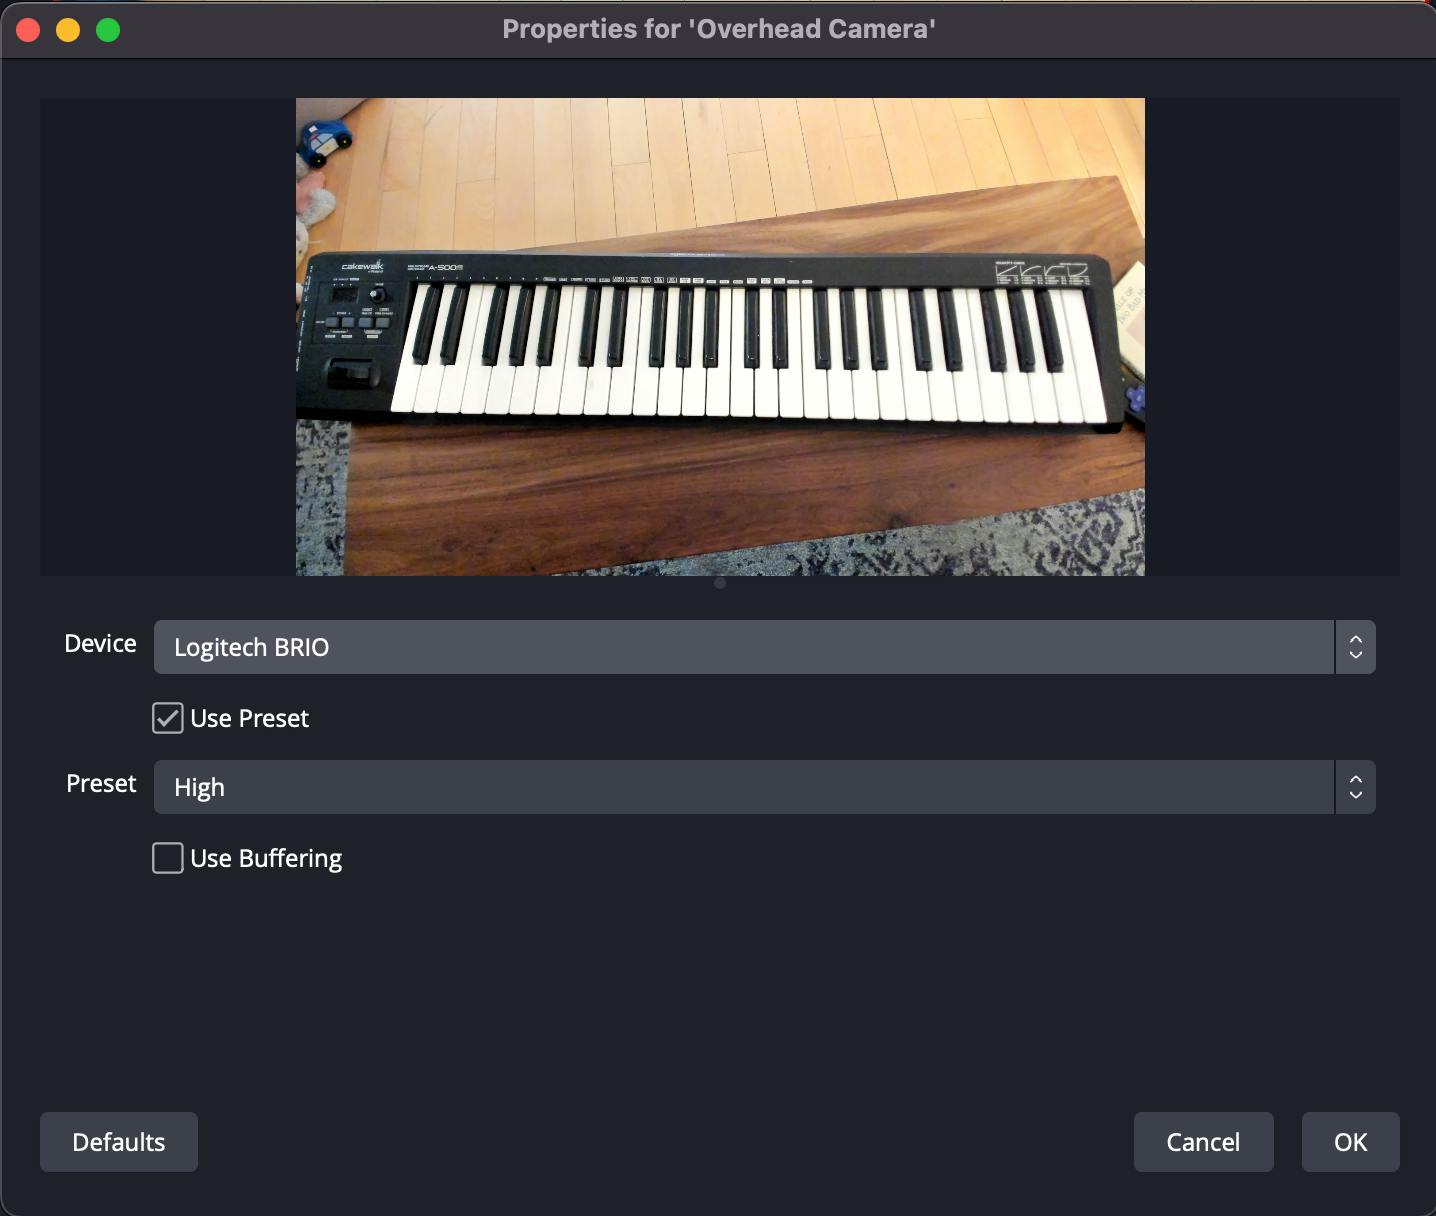
Overhead camera (external USB camera rigged up with a stand)
Click the + in the sources section and add a video capture device. Create a new source and name it “overhead camera.” Now, find the correct camera from the drop-down menu. I have my Logitech BRIO HD USB-C webcam positioned with a good angle of my keyboard, so that is the camera I want to select.
You will need to move, resize, and crop each of your sources so your scene looks organized and ready to teach. My plan is to have my front camera view on the left, the sheet music on the right, and my overhead across the bottom of the entire screen.
This is what my overhead camera view looks like when first selected.

With some cropping and resizing, I will tighten in around the keyboard, resize and move this source into the empty space at the bottom of my scene.

Before we can move the overhead piano angle into place, we need to crop the shot so that it is tight around the keyboard. Hold the option key down (the cursor turns into the double arrow) and move the edges of your source in to crop the shot to exactly what you need.
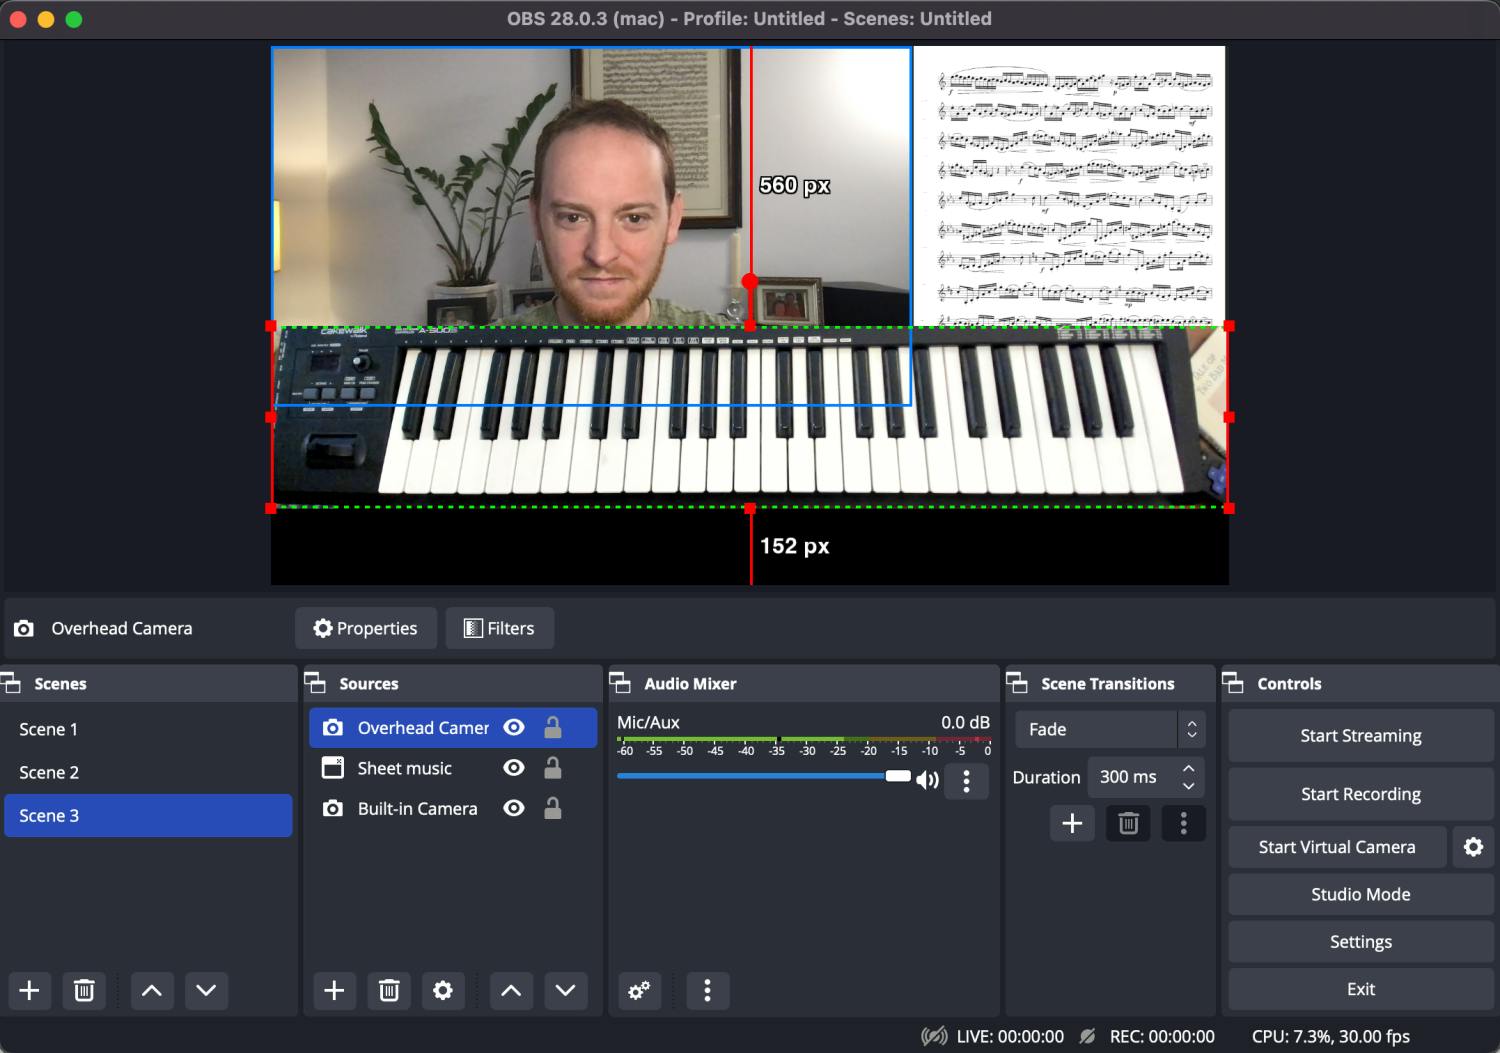
The cropped shot of the piano now fits perfectly along the bottom of my scene.

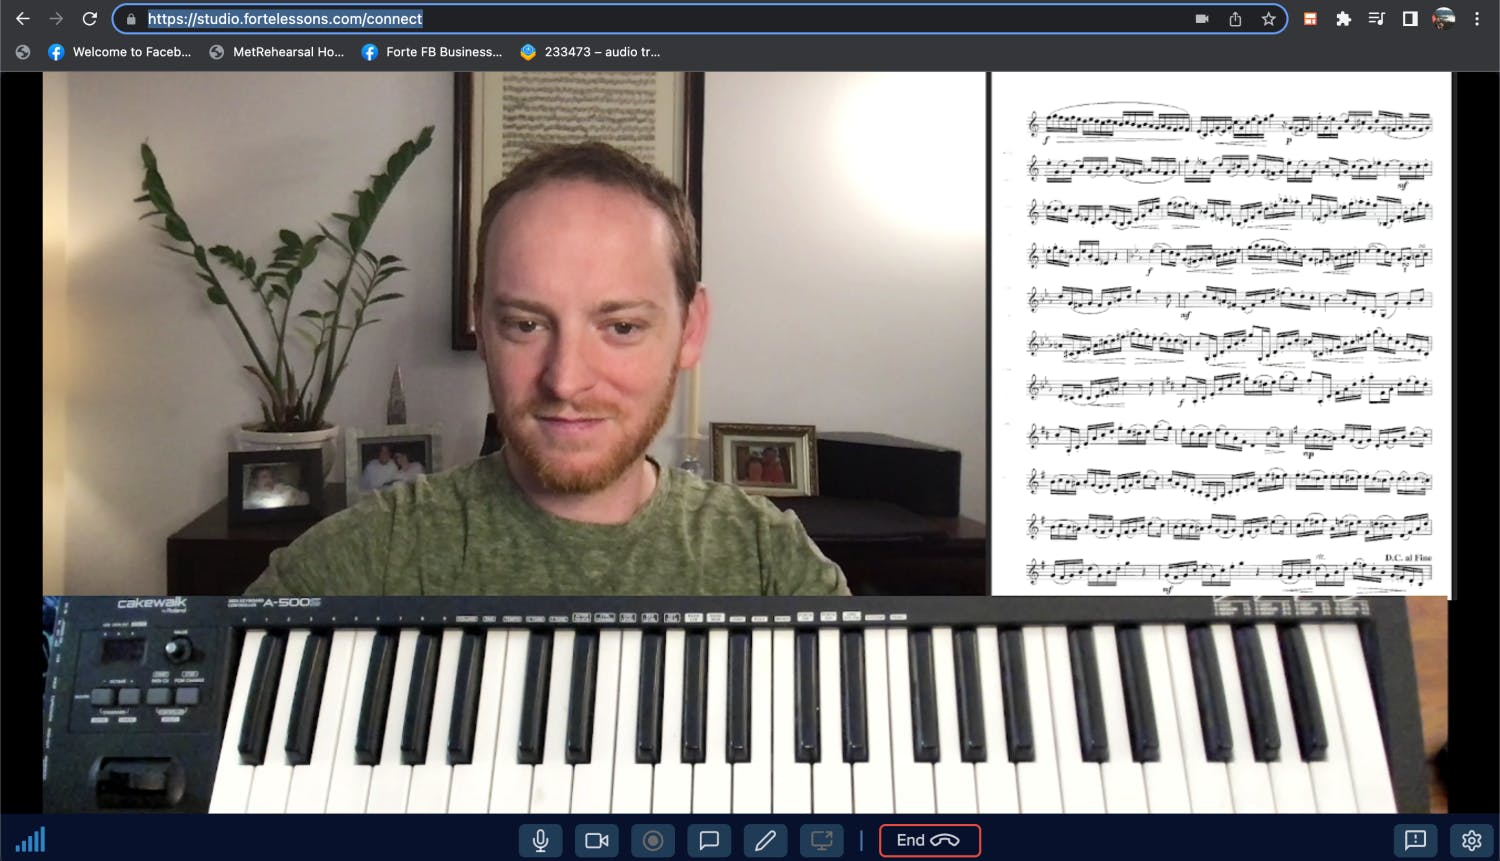
You’re done! Start your OBS virtual camera, and what you see in the image above is now exactly what your students will see when they enter your Forte studio.